Adding product categories to your Google Business Profile is a great way to showcase your arrangements and drive more traffic to your website. Follow this step-by-step guide to get started!
Step 1: Log In to Your Google Business Profile
Head over to business.google.com and log in using the email associated with your Google Business Profile.
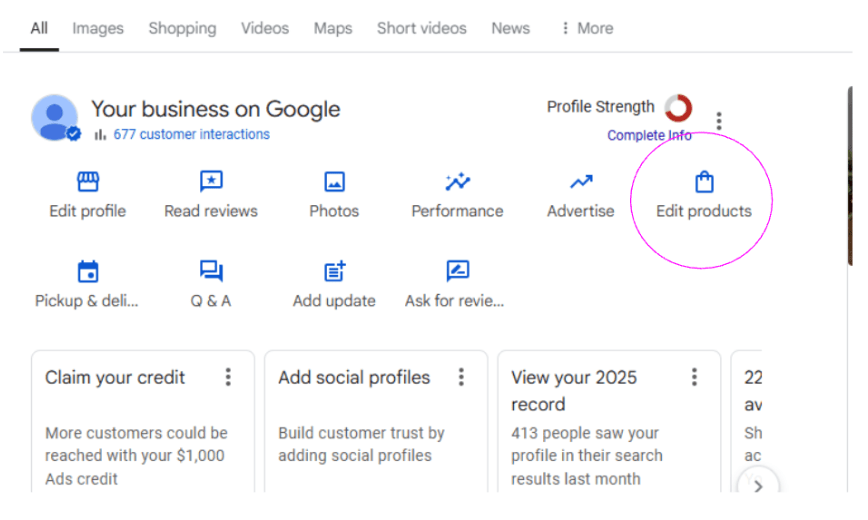
Step 2: Navigate to “Edit Products”
Once you’re logged in and viewing your profile dashboard, look for the “Edit Products” option and click it. Then, select “Get Started” to begin adding your first product.
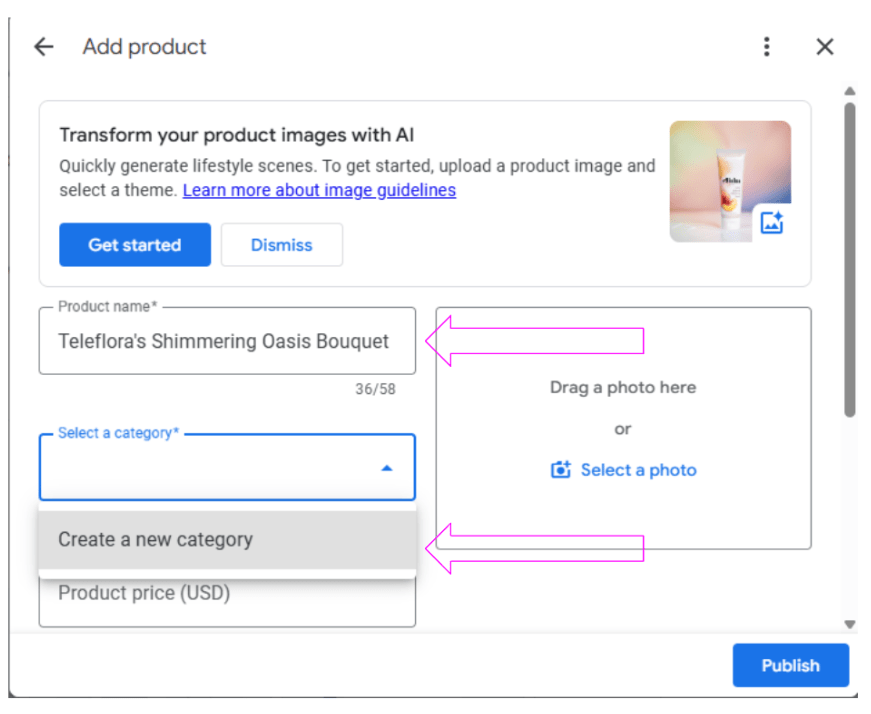
Step 3: Add Your First Product
- Product Name: Enter the name of your arrangement exactly as it appears on your website. This helps with consistency and search relevance.
- Category: Click “Create a new Category”. You’ll name the category—something like “Spring Arrangements” or “Sympathy Flowers”—depending on the theme of your product.
Once you’ve created a category, you’ll be able to reuse it when adding other similar products.
Note: You can also connect your website to the Google Merchant Center to automatically feed your products. Read: What Is Google Merchant Center?
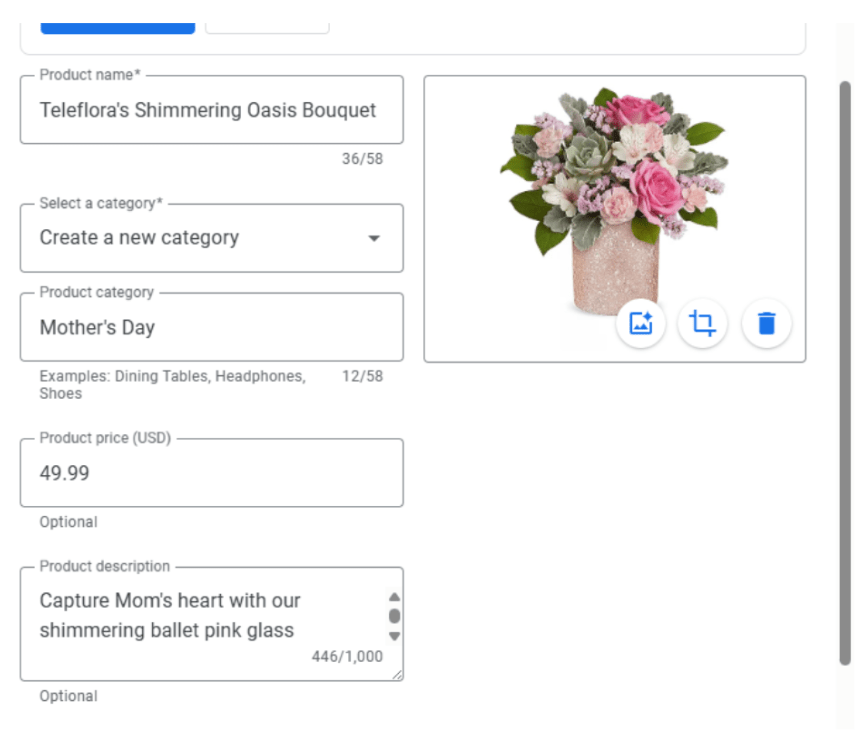
Step 4: Fill in Product Details
- Price: Use the lowest price point listed for the product on your website. For example, if an arrangement starts at $59.99 and goes up based on size or upgrades, enter $59.99 here. This gives customers a realistic idea of the starting cost and helps avoid confusion.
- Description: Use the product description from your website to keep the messaging consistent.
- Product landing page URL: This part is key! Copy and paste the exact web address (URL) of the product from your website. This should be the direct link to the individual product page—not your homepage or category page. When customers click the product on your Google Business Profile, this link will take them straight to your site where they can learn more or place an order. It’s an easy way to drive traffic and potential sales!

Step 5: Add a Product Image
A great photo makes a big difference—it’s often the first thing potential customers will notice.
- Save the image from your website: Go to the product page on your site, right-click the image, and choose “Save As” to download it to your computer.
- Rename the image file: Before uploading, rename the image file to match the product name (e.g., Telefloras_Shimmering_Oasis.jpg). This helps with SEO and ensures the file is clearly labeled and easy to manage if you need to update it later.
- Upload the image: Back in your Google Business Profile, upload the renamed image to the product listing. Make sure it’s clear, well-lit, and shows the product as it appears on your site.
High-quality, consistent images help your product listings look more professional and trustworthy—plus, they create a smoother experience for customers hopping from your profile to your site.

Step 6: Publish
Click “Publish” to finish adding the product and product category.
Step 7: Add More Products
When you go to add another product, you’ll now have the option to:
- Select an existing category (like the one you just created), or
- Create a new one if it’s a different type of product.
[Learn more about: How City Pages Help Your Florist Website’s Visibility]
Why This Matters
Adding products to your Google Business Profile not only gives your customers a visual preview of your work but also helps Google match your listings to local search queries. Plus, with each product linking directly to your website, you’re making it easier for people to browse and buy from you.
Need a hand getting started or have questions along the way? Don’t hesitate to reach out—we’re happy to help!